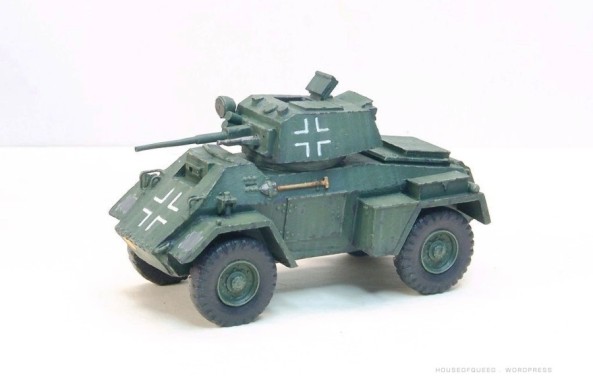
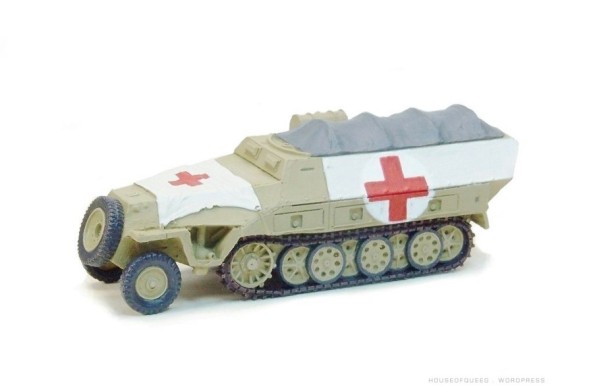
A Bridge Too Far – 28mm Bolt Action project wip11

A little progress ….

Started the post shading and almost finished the Warlord 251/8. Still have the front mudguard width indicators to add and to weather/pigment the running gear and lower hull.

bft - 251-8 093 grp

Also got the base colours corrected and painted on the Warlord British project that’s running at the same time …

Britz - 030 1250

Britz - 032 1000

cheers
Q

And a small progress update (easier than a complete post for 1 pic lol)

Britz - 035 quad 740

Tamiya 1/48th Pershing – Super Pershing triple project wip5

Primer paint on ….

Added some Blackdog stowage and sprayed an enamel primer coat (Tamyia OD rattlecan). The stowage needed some work to get it to fit and I added green stuff “tarps” as a base to each piece to get them to sit down with the usual problem of rigid resin stowage.

Next steps are to mix up my preferred shade of acrylic OD (GW Catachen Green and Vallejo OD) and brush on the base paint ….

Q

48tam spershing 080 1150

48tam spershing 081 1150

48tam spershing 082 1150

48tam spershing 083 1150

Empress Miniatures Modern USMC Infantry 28mm – FIRETEAM

Empress 28mm Modern USMC Infantry …

Some more Empress 28mm Moderns we painted (my brother Craigs brushwork) for Skirmish gaming with our FireTeam rules. The figures are in the USMC exclusive Desert Marpat camouflage pattern and have a mix of equipment probably suitable from the early 2000’s through to almost present day.

USMC Marpat was introduced in 2002 as a replacement for the shared service BDU series of patterned combat uniform and is available in two patterns, desert and woodland. Initially based on the Canadian Cadpat pattern it also introduced elements of Tiger Stripe and Rhodesian Brushstroke patterns and even manages to work in the Marine Globe and Anchor into the pattern.

Interesting trivia – As the MCCUU (Marine Combat Corps Utility Uniform) uniform system is designed to be both used for general work/fatigue duties and combat, new regulations had to be introduced forbidding it to be worn off base unlike the older general fatigue uniform.

Q

emp USMC1 900 5lg

emp USMC2 900 5lg

emp USMC3 900 5lg

emp USMC4 900 5lg

emp USMC5 900 5lg

And some useful USMC uniform references (from public web sources and included for info/discussion only) ….

A Marine with Company I, 3rd Battalion, 5th Marine Regiment, sights in on his M-16A2 automatic service rifle during tank integration training with Company C, 2nd Tank Battalion, at Camp Baharia, Iraq, Nov. 2, 2004. When combined with tanks, the infantrymen put tanks in a position where they can effectively use their weapons and prosecute targets, using the tanks to their advantage on the battlefield.

A Marine with Company I, 3rd Battalion, 5th Marine Regiment, sights in on his M-16A2 automatic service rifle during tank integration training with Company C, 2nd Tank Battalion, at Camp Baharia, Iraq, Nov. 2, 2004. When combined with tanks, the infantrymen put tanks in a position where they can effectively use their weapons and prosecute targets, using the tanks to their advantage on the battlefield.

usmcref 002

U.S. Marine Sgt. Bryan Early, a squad leader with 1st Battalion, 9th Marine Regiment, provides security for Marines moving to the next compound during a patrol in Helmand province, Afghanistan, Dec. 22. (U.S. Marine Corps photo by Cpl. Austin Long)

U.S. Marine Sgt. Bryan Early, a squad leader with 1st Battalion, 9th Marine Regiment, provides security for Marines moving to the next compound during a patrol in Helmand province, Afghanistan, Dec. 22. (U.S. Marine Corps photo by Cpl. Austin Long)

040523-M-9382M-004 Marines from Company I, 3rd Battalion, 6th Marine Regiment, patrol on foot through downtown Surobi, Afghanistan, on May 23, 2004.  The battalion is conducting security patrols and civil assistance operations throughout the region in support of Operation Enduring Freedom.  DoD photo by Lance Cpl. Justin M. Mason, U.S. Marine Corps.  (Released)

040523-M-9382M-004
Marines from Company I, 3rd Battalion, 6th Marine Regiment, patrol on foot through downtown Surobi, Afghanistan, on May 23, 2004. The battalion is conducting security patrols and civil assistance operations throughout the region in support of Operation Enduring Freedom. DoD photo by Lance Cpl. Justin M. Mason, U.S. Marine Corps. (Released)

usmcref 005

usmcref 007

usmcref 008

120322-M-PH863-005 U.S. Marine Corps Lance Cpl. Leobardo Nunez provides security during a census patrol through a village near Khan Neshin, Afghanistan, on March 22, 2012.  Nunez is an infantry automatic rifleman assigned to Alpha Company, 1st Light Armored Reconnaissance Battalion.  DoD photo by Cpl. Alfred V. Lopez, U.S. Air Force.  (Released)

120322-M-PH863-005 U.S. Marine Corps Lance Cpl. Leobardo Nunez provides security during a census patrol through a village near Khan Neshin, Afghanistan, on March 22, 2012. Nunez is an infantry automatic rifleman assigned to Alpha Company, 1st Light Armored Reconnaissance Battalion. DoD photo by Cpl. Alfred V. Lopez, U.S. Air Force. (Released)

Tamiya 1/48th Pershing – Super Pershing triple project wip4

Spaced armour completed ….

Finished the additional spaced armour package today plus most of the other Tamiya details. Top hatch and aerial mounts will go on after base paint has been laid on.

Not much to say about the process, I used a few basic tools, tech drawing dividers, steel ruler and the always efficient eyeball. I basically guesstimated the sizes and dimensions using photo refs on the pc, my 20mm conversion and the Hobby Boss 1/35th kit. The hydraulic balance cylinders have been fudged a bit as at the end of the day this is for gaming not competition (like I’ve ever done a competition model lol).

Enjoy

Q

48tam spershing 065 FRA 1000

48tam spershing 068  1250

48tam spershing 069  1250

48tam spershing 070  1250

48tam spershing 071  1250

Tamiya 1/48th Pershing – Super Pershing triple project wip3

Turret mods ….

Finished the turret mods required to match the Pilot vehicle.

– Trimmed down the track guards. No idea why they narrowed them but it does add some extra cool.
– Smoothed down the indentation where the pistol post is glued, not fitted to the trial turret.
– Replaced the oval loaders hatch with a big split hatch (left over from a Hobby Boss Sherman.
– Made a turret rear bustle counterweight out of scrap resin and plasticard.
– Made an extended gun barrel for the T15E1 L/73 90mm.

Next it’s onto the front spaced armour, which was actually 30mm boiler plate so leaning more towards the spaced and less towards the armour side of things.

Q

48tam spershing 040 hatch 1000

48tam spershing 055 1250

A Bridge Too Far – 28mm Bolt Action project wip10

Pin washes all finished ….

Lined the Opel Flak and cargo, the last 250/1 and put a filter over the 251/7 to match it to the shades of the others as originally it was going to get a late war factory 3-colour finish.

All vehicles are now pin washed and basically ready for finishing work, the usual stuff being shading, chipping, streaking, markings and pigments. Stowage will be added and detailing finished ….. they’re on the home stretch.

Q

bft - 087 grp 1350

And a bonus pic of the next group, again for use mainly with Bolt Action rules. These are to be finished along with the Tamiya 1/48th Super Pershing conversion.

Britz - 025   1100

Tamiya 1/48th Pershing – Super Pershing triple project wip2

Tamiya 1/48th Pershing, Hobby Boss 1/35 Super Pershing ….

Work begins on the 1/48th Super Pershing conversion beginning with the lower hull. Like all 1/48th Tamiya kits (those that I’ve built anyway) assembly is very straight forward. The only slight hassle involves the fitting of the plastic out hull parts to the metal hull monocoque. Super glue is required here and is unforgiving due to it’s rapid set time. Superglue gel should really be used here … or better yet lets hope all new Tamiya kits have plastic hulls.

Anyway fit of parts is good so far and with no issues. The Link and Length tracks fit well although this is the step where most care is required ….

Q

48tam spershing 010 1100

48tam spershing 015

48tam spershing 020 1100

48tam spershing 022 1100

Hobby Boss 1/35 Super Pershing “Pilot Model”

Managed to get in a little work on the Tamiya kits bigger brother. Not much progress yet but so far the fit of parts is good with no issues.

35hb spershing 010 1100

35hb spershing 012 1100

E-35 Hetzer II development – Project ’46

E-Series Hetzer II ….

Another of my explorations into German E-Series development. I’ve always liked the Swedish S-Tank partially from the concept/tech solution side and partly because it always reminded me of the German Jagdpanzers, especially the Hetzer and small E-Series ones (E-10 and E25).

So I spent some time last year trolling the interwebs and looking at the S-Tank history and development. I liked the autoloader as a solution to mounting a bigger weapon on the smallest chassis possible and it fitted well with the German proposals. In addition to that the E-10 was proposed to have hydropneumatic suspension levelling, a system also adopted in the Strv 103 and the US MBT70 prototypes.

And so through the wonder of Photopaint here’s my concept for a Hetzer II 35ton E-Series Jadgpanzer. The plan is to combine a Trumpeter S-Tank (Strv 103c) with bits from a Revell Tiger II and a dash of gizmology thrown in ….

Q

Hetzer II v3

Hetzer II v5

A Bridge Too Far – 28mm Bolt Action project wip9

Pin wash lining …

More vehicles have been pin washed/lined and now I think there’s only 3 more to go before I go back over with the depth shading. All lining was done using very thinned oils, various shade mixes of Burnt and Raw Umber, Brown Madder and Lamp Black.

The advantage of using oils are that they are a little more controllable than acrylic pin washes in that any excess or mistakes are easily mopped up with a clean brush and clean thinners. Acrylics tend to bind and dry on the surface very quickly and while achieving the same result are much less forgiving.

Being so thin the oils dry pretty quickly and the vehicles can be handled again in 15mins or so and I use Odourless spirit which gets around the strong smell associated with thinners.

Q

bft - 086 grp 1400

bft - luchs 050 900

bft - luchs 051 900

bft - 251-7 051 900

bft - 251-7 050 900

bft - 251-v2 050 900

bft - 251-v2 051 900

bft - 250-v2 050 900

bft - 250-v2 051 900

bft - 222 051 900

bft - 222 050 900

By houseofqueeg Posted in General

Tamiya 1/48th Pershing – Super Pershing triple project

Pershing Madness . . .

Another project starter primarily to convert a Tamiya 1/48th Pershing into a Super Pershing replica for gaming use but I thought I’d make a start on building the 1/35th Hobby Boss Super Pershing from the stash at the same time … then of course there are the 4x 20mm Super Pershings that are already partially built.

Q

Just like the smell of a new book, new kit boxes hold so much promise ….

48 Superpershing conv 001 900

Super Pershings grp 900

tr t26e4 -050 1500

A Bridge Too Far – 28mm Bolt Action project wip8

Base camouflage finished ….

And last update for a while (been spamming the blog too much with this project me thinks). Polished off the base camouflages today so it’s all finishing work from here – lining, streaking, detailing, markings and pigments.

Q

bft - 084 grp 1500

bft - 085 grp 1500

A Bridge Too Far – Warlord Games, Blitzkrieg Miniatures and JTFM 28mm Bolt Action project wip7

SdKfz231, Opel Blitz w/Quad 20mm, SdKfz251/1C SPW, Luchs, SdKfz222

Making progress with the base camouflage and also managed to get the first stage lining done on the 251 and 231. I also shaded the Splinter camouflage on the Opel Blitz Flak …

Q

bft - 082 grp 1250

bft - 083 grp 1250

bft - 076 900

bft - 077 900

bft - 091 900

bft - 090 900

A Bridge Too Far – Warlord Games, Blitzkrieg Miniatures and JTFM 28mm Bolt Action project wip6

More wips …..

Working on getting the base camouflage worked up. One of the challenges on this project is that by request the camo all has to be variations of yellow/green so that means no tri colour schemes. So the trick is to come up with enough variations (tones and patterns) to cover the large number of vehicles ….

Q

Opel Blitz, 251SPW and 250/8 SPG with their base camo laid on ….

bft - 80 grp

A couple of wip shots of the camo going on the SdKfz231 8-rad to show that there’s no real trick to brush painting the patterns. First a lighter base colour is laid on followed by a darker overlay, sometimes using a couple of layers depending on the shade and density I’m after.

bft - 71 1100

bft - 70 1100

A Bridge Too Far – Warlord Games, Blitzkrieg Miniatures and JTFM 28mm Bolt Action project wip5

Warlord Grabners Humber A/C and 251/8 . . . .

Finally managed to get a little more progress done on the Bridge to Far project getting the 251/8 Ambulance and Grabners Humber Armoured Car to the final stages. QC, final detailing, markings and pigments to go ….

Q

.
bft - 071 900

bft - 072 900

bft - 055 900

bft - 056 900

bft - 053 900

bft - 052 900

bft - 064 900

bft - 65 900

bft - 060 900

bft - 061 900

bft - 051

FIRE TEAM – Russian Federation Ground Forces Infantry – Empress Miniatures Modern Russians 28mm

Back from the dead …….

It seems like another apology for an unforced absence is in order. 2015 started well but during the later half I struggled with various health issues that made modelling at best uncomfortable and when at worst – impossible. At present I’m back at the table and trying to catch up firstly and most importantly on commissions that are now very delayed and after those then hopefully to get back into some of our own projects.

Fortunately my brothers been picking up some slack on our modern Fire Team project and here’s some of that result, 28mm Russian Federation Infantry from Empress Miniatures, along with a few packs and simple conversions from their older Cold War range. The later figures are in the new Ratnik (Warrior) uniform system featuring new LBE, Coms and Armour Protection systems which have comparable levels of performance to those systems more commonly seen in Western Nations.  After being issued primarily to elite troops for trials the Ratnik system is now being rolled out to first line units with around 80,000 sets having recently been deployed.
Q


RUS01 1000 RUS02 1000 RUS03 1000 RUS04 1000 RUS05 1000 CWR06 1000 CWR07 1000

References and Painting

To go with the latest “Ratnik” uniforms the troops have been painted in the summer variant of the Russian pixelated camouflage. The “digital” style camo system was introduced around 2008 and is known as EMR or unified camo (as used by all armed forces) and the pattern is often called Tsifra, Tetris or “Digital Flora.” The other various colour combinations commonly used include Northern, Winter and Urban patterns.

We painted the figs to get an impression of the pattern rather than detailing the individual dots and used the following colours;

Coat d arms: Russian green for uniform
Coat d arms: Black Green for digital spots
Coat d arms: Panzer grey for weapons, gloves and some(little) for digital spots
GW: Tallarn flesh and elf flesh blend/highlight with gryphone sepia wash for faces
Any yellow paint and several layers of sepia wash for lens of glass goggles
Vallejo: Iraqi sand for drybrush dust – use lightly and very dry…

Useful Ref Pics …….

modru inf 023

modru inf 041

modru inf 025

modru inf 076