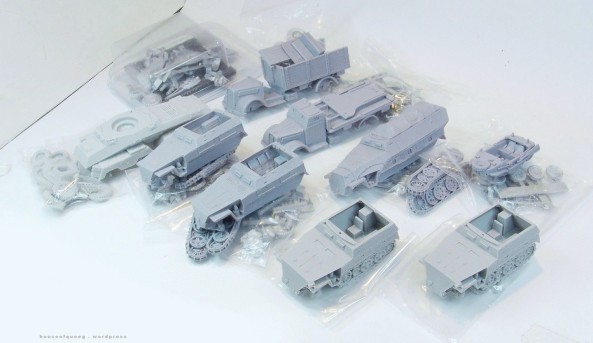
Yes, kits . . . . .
As mentioned the kits are mostly Warlord primarily because of availability of subjects, some Blitzkieg because we wanted to compare the quality and a few JTFM which I had lying around. In addition there are various stowage packs from Warlord and JTFM and decals from Warlord.
Warlord Games
Opel Blitz with open canopy
Opel Blitz and 2cm Flak
SdKfz 251/1C SPW (Plastic kit) x2
SdKfz 251/8 Ambulance
SdKfz 250/7 Neu 81mm Mortar
SdKfz 250/8 Neu 7.5cm SPG Stummel
PzKpfw II Ausf.L Luchs Recce
Flakvierling 38 20mm
Schwimmwagen
SdKfz 222 Armoured Car
Grabners Humber Armoured Car
BlitKrieg Miniatures
SdKfz 231 2.0cm 8rad Armoured Car
SdKfz 250/1 Neu SPW x2
JTFM
SdKfz 251/7 Engineer SPW
I didn’t take “sprue” or contents pics of everything, shame on me I know, but did for the Plastic 251/1Cs out of interest as I hadn’t made a Warlord plastic kit before.
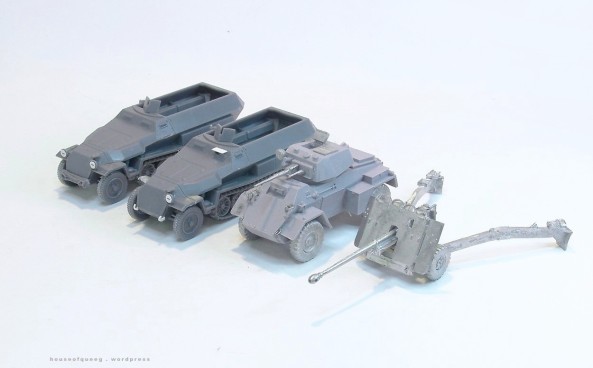
And this was the second batch of received vehicles.
I tackled assembly as the kits arrived, helped by the fact they came in distinct groups. The first batch was the Luchs, 222, x2 251/Cs and Grabners Humber. Just a note, I’ve made comments on the assembly and details of the kits. Don’t take offence, these are personal comments and please remember that at the end of the day they will look great once painted … and that is the most important thing.
Warlord 251/1C Plastic kits. The plastic 251s were pretty basic and easy to assemble. I made a few small mods to give them some character and they’ll get some final detailing (aerials, stowage, width indicators) once basic painting has been done.
Warlord Luchs. Like the plastic 251s the Luchs assembles easily with excellent and sharply moulded detailing. There were no issues except a bit of grinding with the dremel to thin out the track guards and searching the spares box for a replacement 2cm main gun as the kit one was a string of white metal and let down the rest of the kit. I added some details out of the spares box using left over 1/48 Tamiya tank tools and will add a few more after the camo has been painted.
Warlord Grabners Humber. Reasonable assembly but the first kit that looked “off” to both my eye and when comparing it to reference pictures (the turret in particular is terrible in shape and dimension). I don’t mind “fast build” or less detailed kits but do get annoyed when Masters at this size are made without some care and attention. To be completely honest it’s been my personal issue with 1/56th gaming resin kits for many years and the reason I favour 1/48th kits and haven’t delved into 28mm much. But enough of the personal soapbox, I added guards for the front lights, towing hooks and a stowage box to the right hand side and as usual will add a few more items after basic painting.
Warlord SdKfz222 A/C. I think this is one of their older kits and I added a lot of extra detail to try and break up the look. The wheels are terribly undersized and are the worst feature of the kit making it look oddly proportioned. I would have replaced them if I’d had anything in the spares box that was the right size. The turret screen are moulded in solid white metal which is understandable but have no texture to the inside face if you wish to have them open like I did. Again personally I would have replaced these with PE 1/48th upgrade parts as they still would have been strong enough for handling on the table and look far better.
And the whole group base coated using a Tamiya rattlecan (TS-3 Desert Yellow)
My Milicast Grabner Humber competed many many years ago …. pretty much how I’m hoping this one will look.
Blitkrieg SdKfz 231 8rad. Only basic assembly completed so far but a very nicely moulded kit. The wheels are very nicely moulded with a sharply detailed (if fantasy) tread and wheel hub pattern that probably won’t be noticed under paint and weathering. They do have very large resin pour plugs however and there’s no way to remove without destroying some of the nicely moulded tread. It would have made much more sense to angle these further towards the rear side of the tire/wheel so that the inevitable removal damage wouldn’t be seen when assembled. Again I’ll try and find something to replace the main 2cm gun with. The kit supplied one is nicely moulded but very thin and fragile.
The pic below shows it with a Bandai 1/48th 232 and JTFM 1/56th 234/2 Puma for comparison.
Warlord Opel Blitz and Opel Blitz AA. Pretty basic assembly and good detail. Both chassis which include the front section of the cab were badly warped however. I soaked them in warm water, straightened them and then set the shape by plunging into iced water. After that though I have noticed that they have taken a slight bend again after warming back up to room temperature. I’ll straighten them once more before assembling further and if they warp again I’ll glue stiffeners to the undersides. There were large resin pour plugs to be removed on the front bumper, take care when removing them. I ground mine away with a dremel but I know not everyone has access to one ….
Warlord SdKfz251/8 D Amubulance. A kit that at first glance looks very nicely detailed and should have been the simplest and quickest to assemble. I wish I had taken more pictures of this one however as I spent about 2 hours grinding at it with a Dremel to get the tracks (oversized) to fit and sit correctly. The hull moulding/master suffers from either mould shift or poor design. Some of the side plates are noticeably splayed out and the underneath is a mystery. One side appears to be aligned horizontally completely differently to the other and is longer/bigger in places than the other side making track fit . . . unusual to say the least. If assembled as is the vehicle sits way too high and the tracks too far back. I also had no choice but to incline the front wheel/axel assembly forward so that the wheels sat correctly. As supplied they sit too far back and too tall, adding to the odd look. I hazard a guess that the problem is in the length of the rear hull and when I get time I’ll run a size check against some scale drawings. So after much grinding the underneath to square things up I’m reasonably happy with how it sits. Although the track drive sprocket looks to be 1/48th in size and catches my eye every time . . .
My easy method of aligning wheels and axels. I like to assemble them before attaching to the vehicle as it makes getting everything square and aligned much easier.
A comparison of the three 1/56th halftracks. While the “C” is more of a comparison of Warlord resin vrs Warlord new plastic, it is still interesting to see all three together. The Warlord C is nice and appears good in profile, recommended. Comparing the 2 251/Ds I much prefer the JTFM version. It looks like the profile drawings even if the detail is a little “dated”. As for the Warlord resin 251/D, I’d personally use alternative manufacturers until Warlord either change the shape or produce a better one in plastic. Again just my views coming from the perspective of what looks correct . . .
UPDATE Ok I dug out a 1/35th plan and overlaid the Warlord 251. Nothing technical, just to see where the differences were. As suspected the rear hull is very short, tracks/road wheels are oversized (although not as bad as I thought, they look worse because of the short hull), nose profile is wrong and the front wheels too small. All that said it should still look good when painted so stay tuned . . .
A completed 20mm Cromwell SdKfz251/8 Ambulance and the finish I’ll be using for the Warlord one.
Q


Useful, thanks for posting! 🙂 Looking forward to seeing these come along
They are proving interesting builds … but should all look good with paint which is the important part. Plus it’s a chance to scope out some vehicle options for a desert/Perry project we’ve been tossing around for a while now ….
Nice kit reviews! Any plans to add the aerial that branches like a tree at the top to the Luchs? (sorry, I have no idea of the actual name of that type of antenna)
Funnily enough it’s just called a Star Antenna, I’ve looked before and haven’t found a tricky German name for it, which is unusual as they love the tech sounding names 🙂 And yup, I thought the Luchs should have one too!
Star Antenna. That’s WAY too easy, for a German technical item!
Sternantenne funnily enough 🙂
That Luchs is giving me a warm feeling all over – the plastic detailing has sharpened things up nicely on that.
Hey matey !!!! Lol, yeah the 1/48th gizmos fit perfectly. A couple of helmets on the side of the turret, a Sternantenna and it’s good to go ….. might even paint the 2 Milicast ones I have here at the same time!
Btw, I take it you’ve seen this Salute preview? Plastic AusfD on the way.
Nice! – They must have read my review – hehehee. No I’ve been down in Wellington brewing up wargaming plans and testing some of my rules sets with my brother and we only had a quick look at pics from Salute. The “C” is pretty good/accurate though so I expect good things from the plastic D.
I’m sure the profile will be much improved. I’ve a suspicion the front wheels might be a little over scale, but that could just be because the details on them are very restrained (compare to the Cromwell 20mm kit for example).
Overall a groovy release though.